Learning the game of pickleball is something that can be quite easy, but also not easy. You need consistency in practicing the game. You can practice anywhere, like at a pickleball club, on the court with friends, or at home.

Of course, if you practice at home, you will need a wall that is suitable and comfortable for you to practice pickleball on. And you can make it yourself. You may be wondering, “How to make a pickleball practice wall?” This article will give you a step-by-step guide to building a practice wall.
Where Can I Practice Pickleball by Myself?
To explore the game of pickleball and become a reliable player, of course you have to keep practicing. You can practice pickleball with your group, your friends, or practice alone.
When you want to practice pickleball independently, you can practice at home. And how do you do that? You can use a wall as an opponent for your pickleball practice. You can use the garage wall, the side of the house, or you can make a special wall to help you practice playing pickleball.
How to Make a Pickleball Practice Wall?
There are 6 easy steps to building a practice wall that we have summarized for you. They are choose a wood, choose a method, connect the plywood, reinforce the outside of the wall, reinforce the inside of the wall, and complete the front of the wall.
Below is a complete explanation of the 6 steps to building the practice wall:
1. Choose a Wood
When building a practice wall, choosing the right lumber is critical to the durability and suitability of the lumber for ball bounce during pickleball play. Therefore, you should consider choosing exterior grade plywood, which is designed to withstand potentially damaging elements.
This type of plywood is an excellent choice because it is water-resistant and will not rot or warp. You should also make the walls 3/4-inch thick for strength, as well as smooth and knot-free wood surfaces to enhance the bounce of the ball.
2. Choose a Method
Determining the right method for creating a practice wall is one of the most important factors you should consider carefully. A simple and effective method will help you work effectively and efficiently.
With a simple method, you can build a wall by creating a frame structure using plywood panels. This also involves joining several panels together to form a solid wall. Another method you can use is to attach plywood directly to a sturdy 2×4 or 4×4 frame.
3. Connect The Plywood Sheets
Once you have selected the wood and decided on the method of construction, you can begin building the practice wall by laying out the plywood panels in the desired sequence. Use wood screws to securely join the panels together and make sure they fit tightly. An electric drill and wood screws are essential tools for this process of connecting the wood panels.
You should also make seams and add glue between the boards to increase the strength of the wall. Make sure that the joints between the boards are even to create a smooth playing surface without any bumps or gaps.
4. Fortify the Interior of The Screen
To reinforce the inside of the training wall, you can add vertical and horizontal supports. Install 2x4s or 4x4s vertically between the plywood panels, evenly spaced, to provide additional reinforcement.
When reinforcing the inside, you can add horizontal braces in the center of the wall to prevent excessive deflection. This internal framework will add rigidity to the structure, minimize vibration, and ensure consistent ball bounce. Don’t forget to use wood screws to secure the braces in place and check for any wobble or instability.
5. Strengthen the Outer Borders of The Screen
After you have reinforced the inside of the wall,, you will need to reinforce the outer edges of the screen to increase the durability and stability of your pickball practice wall.
You can install additional 2x4s or 4x4s along the top and sides of the plywood to frame the entire structure. This will create a stronger boundary that can withstand repeated ball impacts.
Use wood screws and a level to make sure the frame stays straight and secure. The reinforced perimeter will prevent the plywood from bending excessively, thus maintaining the strength of the practice wall over time.
6. Complete the Front Side of The Screen
Once the structural elements are in place, you will need to finish the front of the practice wall by making sure the plywood surface is smooth and free of imperfections. You can sand the surface to remove any rough spots or debris that could interfere with ball bounce.
You can also consider painting the front with a high-quality exterior paint to protect the wood from inclement weather and improve visibility. You can also add boundary lines and target areas in contrasting colors to simulate a real pickleball court.
And last but not least, you should install a sturdy net at the top of the practice wall to mimic the height of the net and help you practice your shots accurately.
Things to Consider Before Make a Practice Wall

Therefore, before you build a practice wall to help you improve your pickleball skills, there are several factors you need to consider, namely:
1. Size: because it can affect the way you practice and the types of drills you can do.
2. Material: Choose a material that is durable and weather resistant.
3. Distance: Make sure the wall is placed at the correct distance from the play area.
4. Angle: Angle the wall to get a consistent reflection
5. Safety: Install padding or protection around the exercise wall to prevent damage to the wall and potential injury.
6. Location: Preferably in a quiet area with enough space to move around and practice your shots.
How Do You Practice Pickleball Against a Wall?
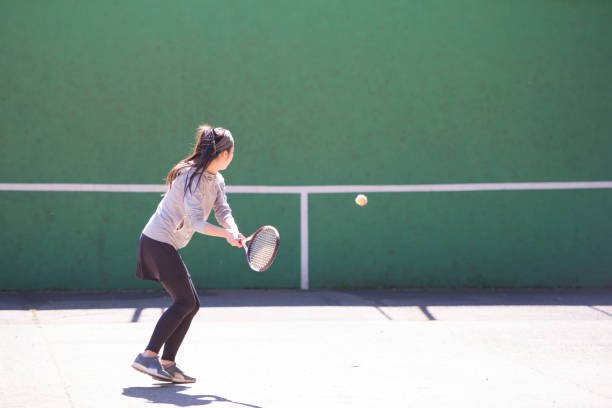
Practicing Pickerball against a wall can be an effective way to improve your skills and perfect your technique. To start, you need to find a suitable wall with a smooth and even surface, preferably one that is not too hard.
When practicing with a practice wall, stand back from the wall and make sure you have enough room to swing the paddle comfortably. Ansa can start with simple exercises, such as hitting a ball against the wall and returning it with a controlled stroke.
As you get more comfortable, vary the speed and angle of the shot to simulate different game scenarios. Combine forehand and backhand shots, practice shots and groundstrokes to improve your all-around skills.
Independent practice using a practice wall allows you to focus on the fundamentals of your skills and develop muscle memory to improve your pickleball game.
Conclusion
You can practice pickleball anywhere, whether it’s a court, a special practice facility, or even at home. However, to practice at home, you need a proper and suitable practice wall to help you practice pickleball.
So, how to make a pickleball practice wall? To build a pickleball practice wall, you can follow the 6 steps outlined in this article.
For more tips and questions you might want to know, feel free to comment below!